Soft measuring tape
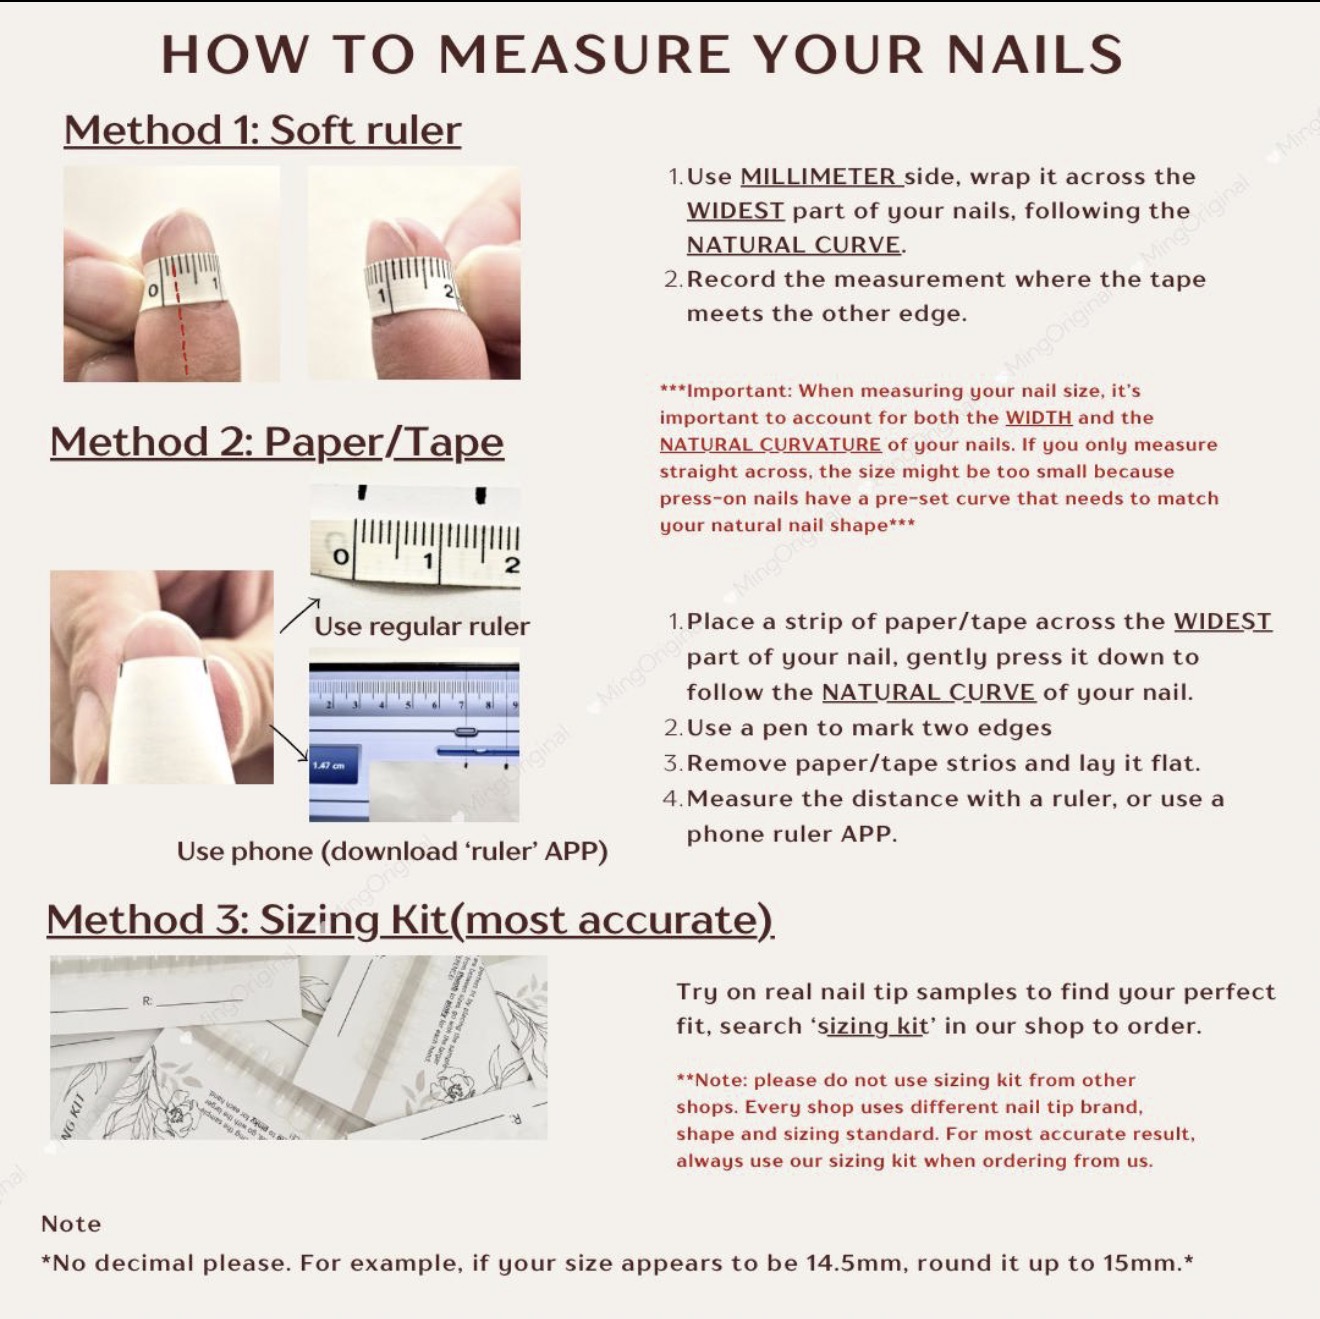
Place the tape across the widest part of the nail and follow the natural curve. Record the measurement in millimeters.
Sizing, application & care
Start with clean measurements, choose your size, and follow each step in order for a comfortable fit and the best chance of reusing your nails.
Begin here
Measure in millimeters across the widest part of each nail. Measure both hands—matching fingers are not always the same size.
Place the tape across the widest part of the nail and follow the natural curve. Record the measurement in millimeters.
Press a narrow strip across the widest part, mark both side edges, remove it, and measure between the marks with a ruler.
Write measurements in finger order: thumb, index, middle, ring, and pinky. Keep them for your next order.
Compare your numbers
Match your measurements to the chart. If one or more nails fall between sizes, choose the larger option.
| Size | Thumb | Index | Middle | Ring | Pinky |
|---|---|---|---|---|---|
| S | 15 mm | 11 mm | 12 mm | 11 mm | 8 mm |
| M | 16 mm | 12 mm | 13 mm | 12 mm | 9 mm |
| L | 17 mm | 13 mm | 14 mm | 13 mm | 10 mm |
Size up. A slightly wider nail can be gently filed at the sidewalls; a nail that is too narrow can pinch, leave gaps, or lift.
Before adhesive
Lay out all ten press-ons and test each one without glue or tabs.
Cover the natural nail from sidewall to sidewall without touching the surrounding skin.
The nail should sit comfortably without pinching or force. Flatter nail beds may need the next size up.
If a nail is slightly wide, file the sidewalls in small, even strokes and check the fit often.
Create a clean foundation
Good preparation helps the adhesive make even contact with the nail.
Choose your wear
Follow the directions included with each adhesive. Never apply adhesive to irritated, infected, or damaged nails.
Shorter wear
Strong hold + easier removal
This combines the grip of a sticky tab with added glue strength while keeping most glue off the natural nail. It is our recommended choice of the three methods for customers who want a stronger hold with easier removal.
Longer wear
Avoid water, lotion, and heavy pressure for at least two hours. Wear and removal vary with preparation, adhesive products, application, lifestyle, and body chemistry. Follow the directions for both products when using the hybrid method.
Protect your natural nails
Forced removal can damage both the press-on and your natural nail.
Prepare for another wear
Careful storage helps protect the shape, finish, and embellishments.
Gently clear remaining adhesive using a method appropriate for the adhesive and nail material.
Make sure the press-ons are completely clean and dry before placing them in a case.
Return each nail to its place so your complete set is ready for the next wear.
You’re ready
Your fit information and favorite set will be waiting for your next mood.
Stay in the know
Get first access to new drops, limited sets, restocks, nail-care tips, and special offers.